
Let’s see how Redux enhances our experience using ReactJS.
What is a State in React ?
The State of a component is an object that holds some information that may change over the lifetime of the component. It enables the component to keep track of changes between renders.
Various individual states like the modal being open or the user not being authenticated make up the overall component state.
Why managing State can be complex in React ?
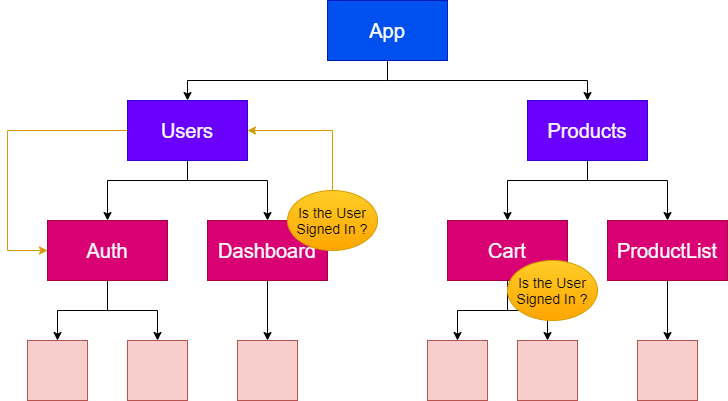
Let’s assume this is our React Application where different components are shown.
Here, the Auth component has the sign-in information and we may also need it in the dashboard component. In this case, it can be done easily without Redux but it may also be needed in the Cart component. Now, creating a connection between Auth and Cart can create a very long chain of props and can be very complex.
One way to solve this is to have a global variable that’s a JavaScript object that can store our entire application state(i.e. Redux).
How does Redux come into play ?
According to the official Redux docs:
Redux is a predictable state container for JavaScript apps that helps you write applications that behave consistently, run in different environments (client, server, and native), and are easy to test.
Redux is used to manage the state of a React app in a centralized place.
It consists of four main building blocks:
- A single, centralized state (i.e. a global JS object) that is not directly accessible or mutable
- Reducers: these are functions that contain the logic for changing and updating the global state by returning a new copy of the old state with required changes. (these can be modified to being async by using middleware like redux-thunk)
- Actions: these are dispatched to trigger a reducer function these are just information packages that can also hold payload.
- Subscriptions to check for any change in the global state and provide the updated state to all the subscribed components.
Let’s understand the Redux Flow
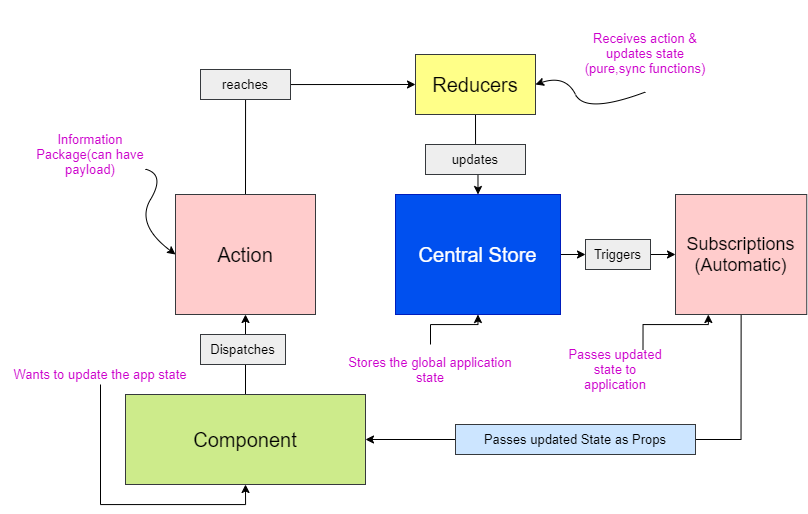
Let’s see how to use Redux with React step by step
We will take a simple react app that keeps a counter. To keep it simple we will only make it increment and add 10 on button clicks.
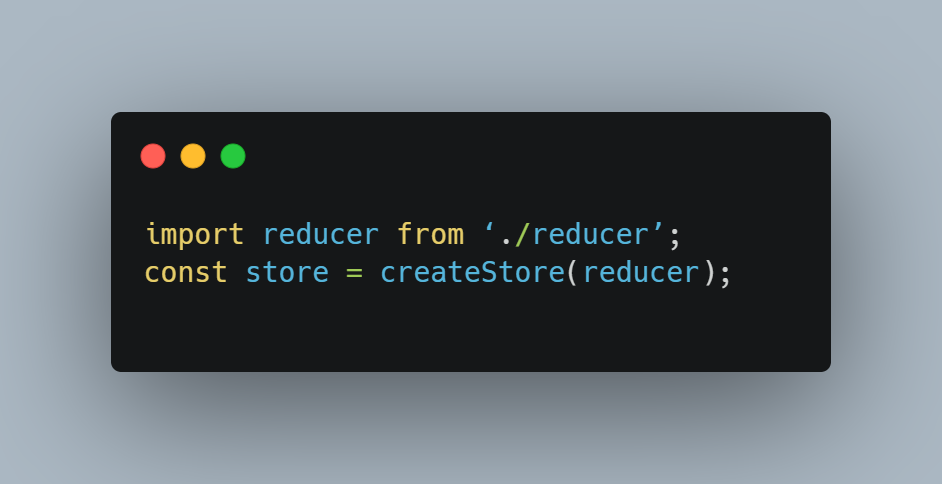
1. Creating the Store
Our redux store should be created when our application starts.
So, index.js is a good place for creating our store
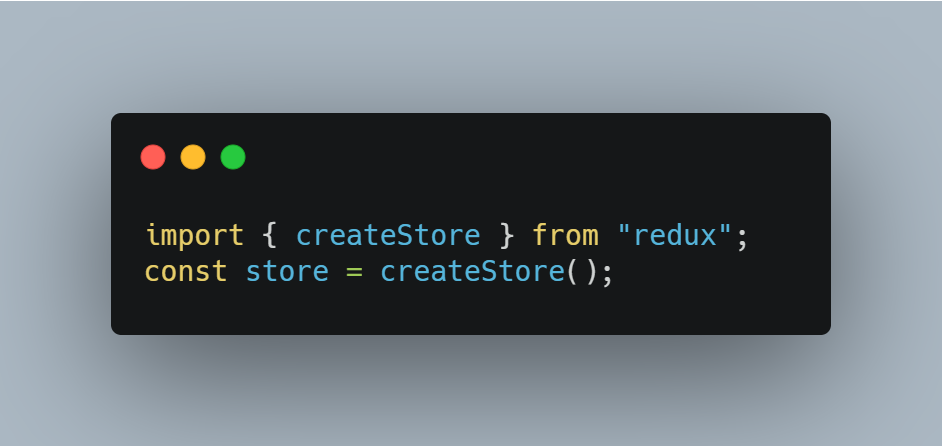
This will create a redux store for us
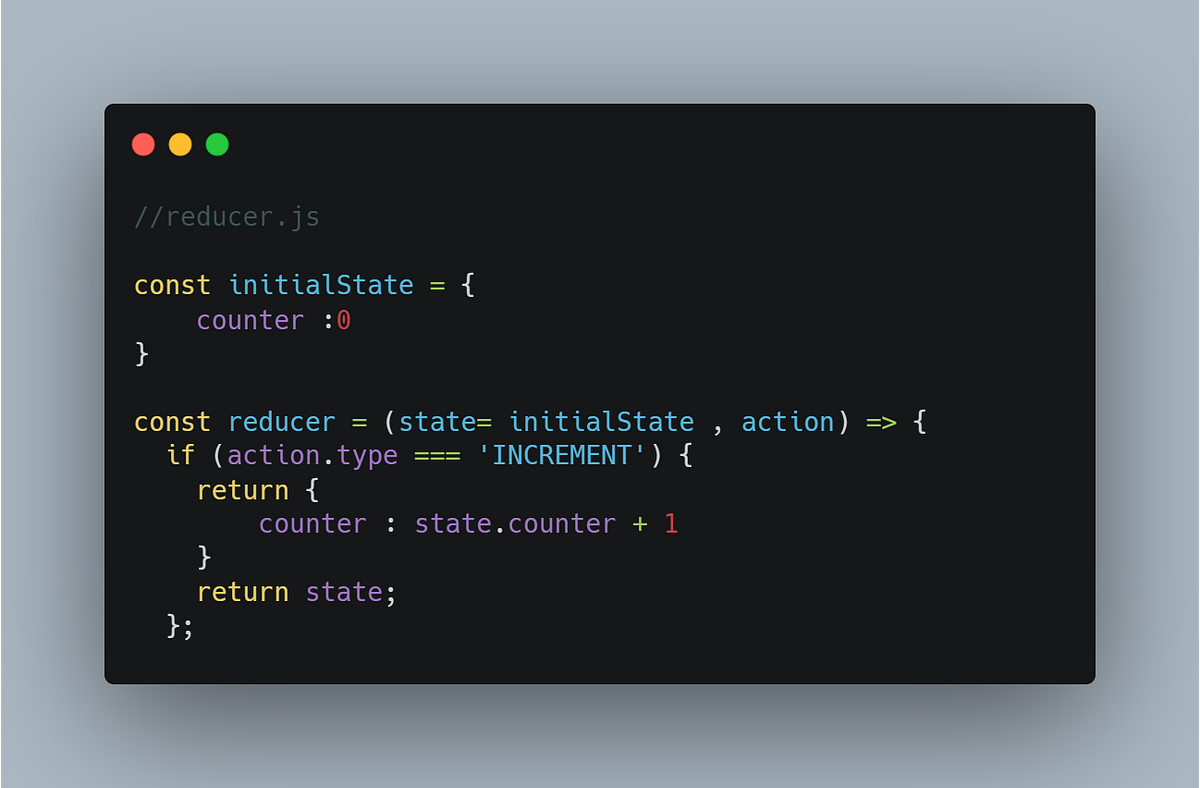
2. Let’s create the reducer.
It is usually a good habit to create your reducers in a separate file. (yes there can be several, but let’s stick to the basics for now)
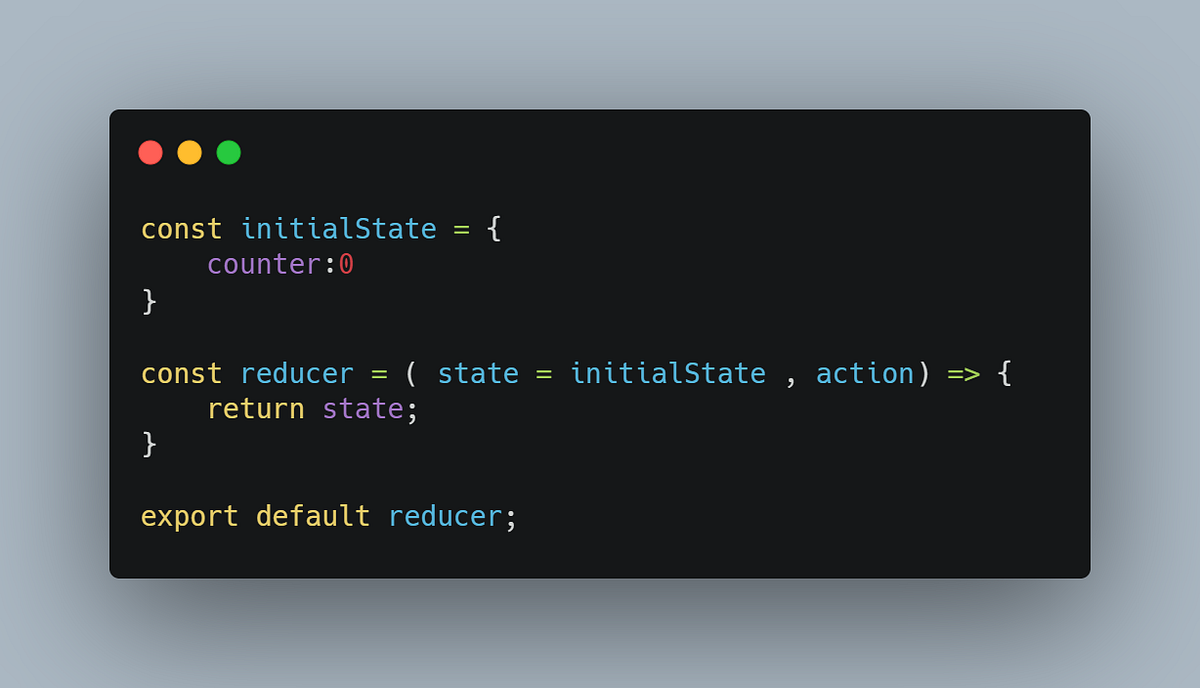
Now, we will import this reducer in the index.js and pass it in our redux store we created in step 1.
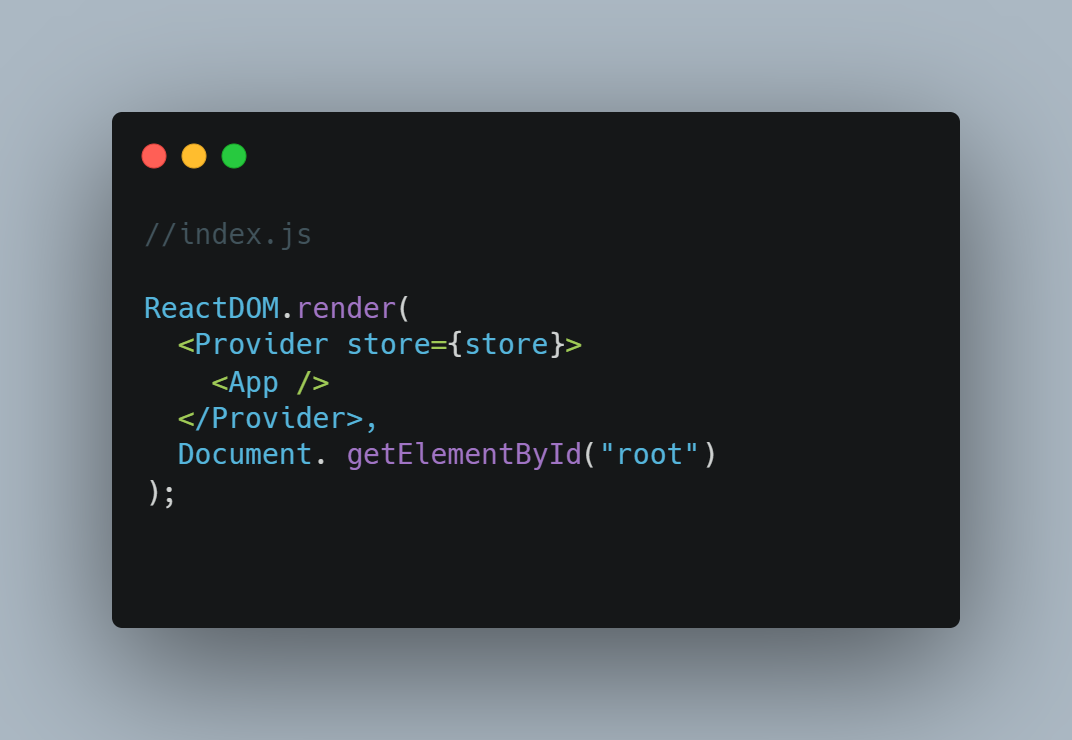
3. Let’s connect our Store to our React App
React redux includes a Provider component, we can make our redux store available to the rest of our app by wrapping our <App/> with <Provider/>
4. Connecting our local State to the Redux Store
The Connect() function provided by redux connects a React component to a Redux store.
In our Counter component, which contains our local state :
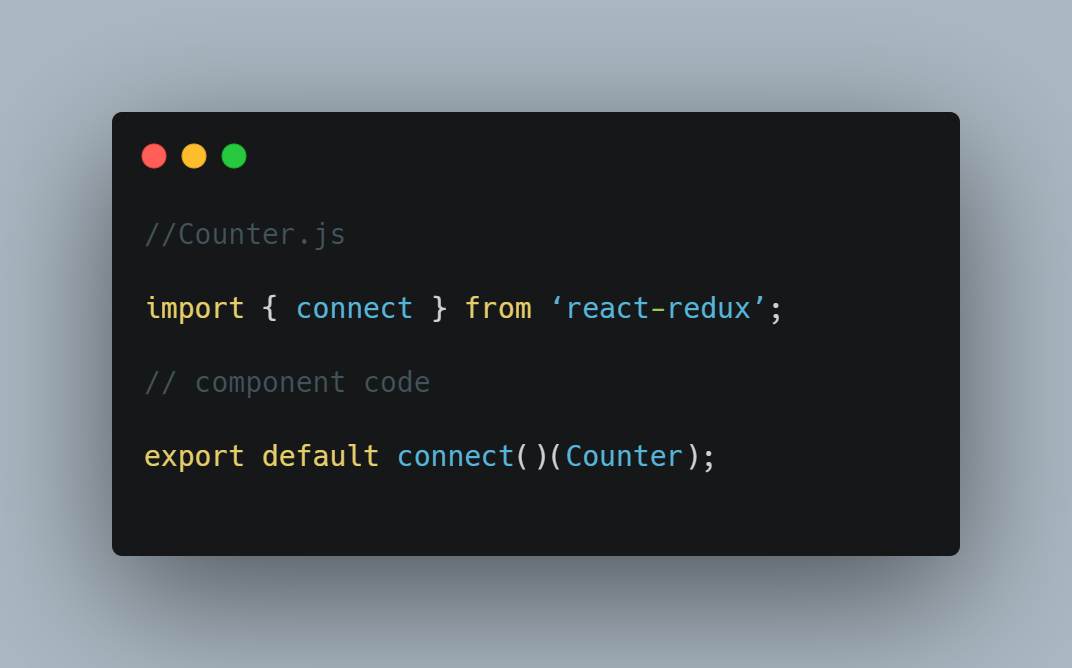
Now, We decide which part of our state we want to get in this component and which actions we want to dispatch
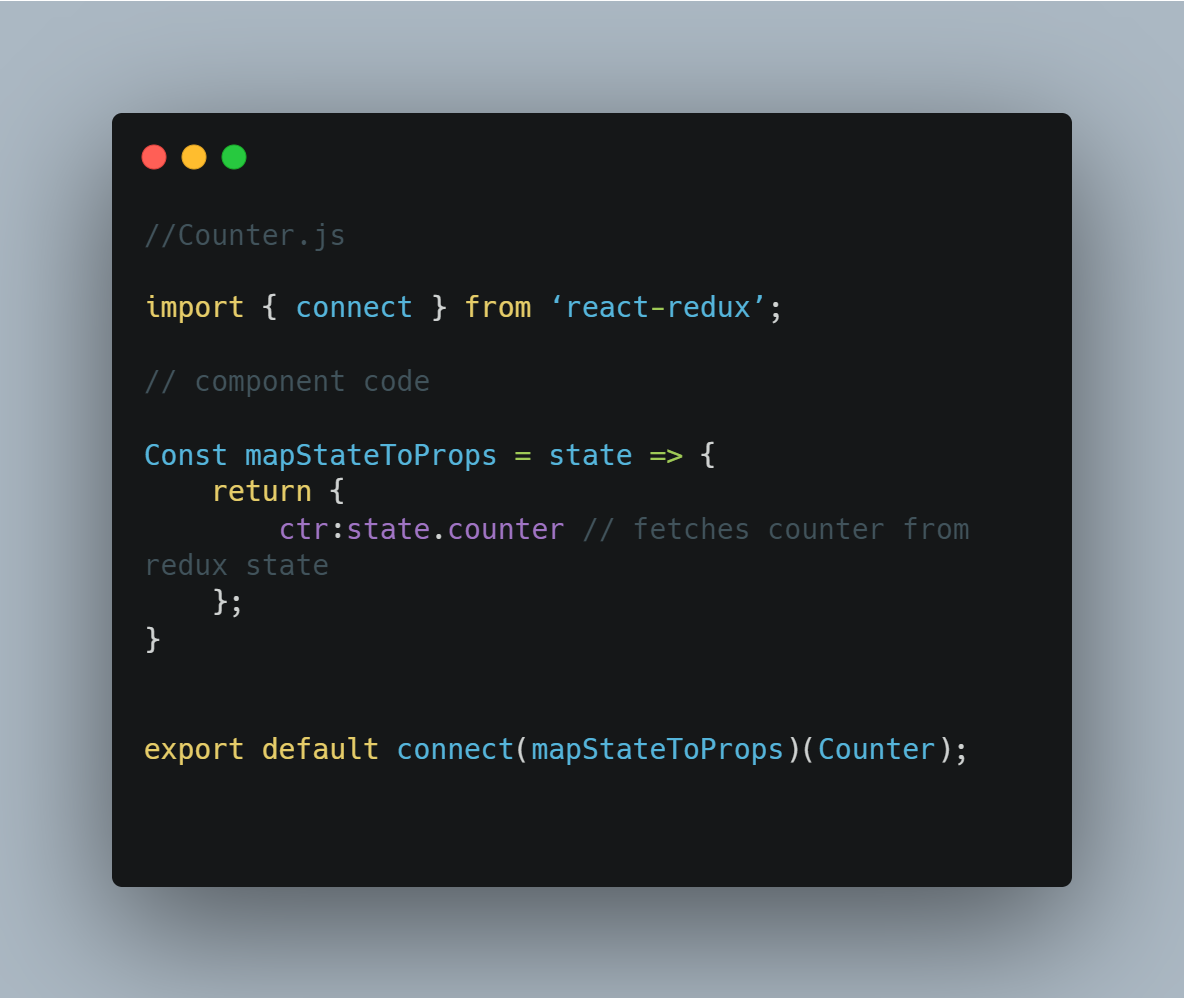
5. Getting our Redux state to our Component
We create a function mapStateToProps that is used for selecting the part of the data from the store that the connected component needs.
We pass this function in our connect function as the first argument.
6. Dispatching Actions from our Component
mapDispatchToProps function is used for dispatching actions to the store.
It let’s us create functions that dispatch when they are called and pass those functions as props to our component.
This is passed as the second argument in our connect function.
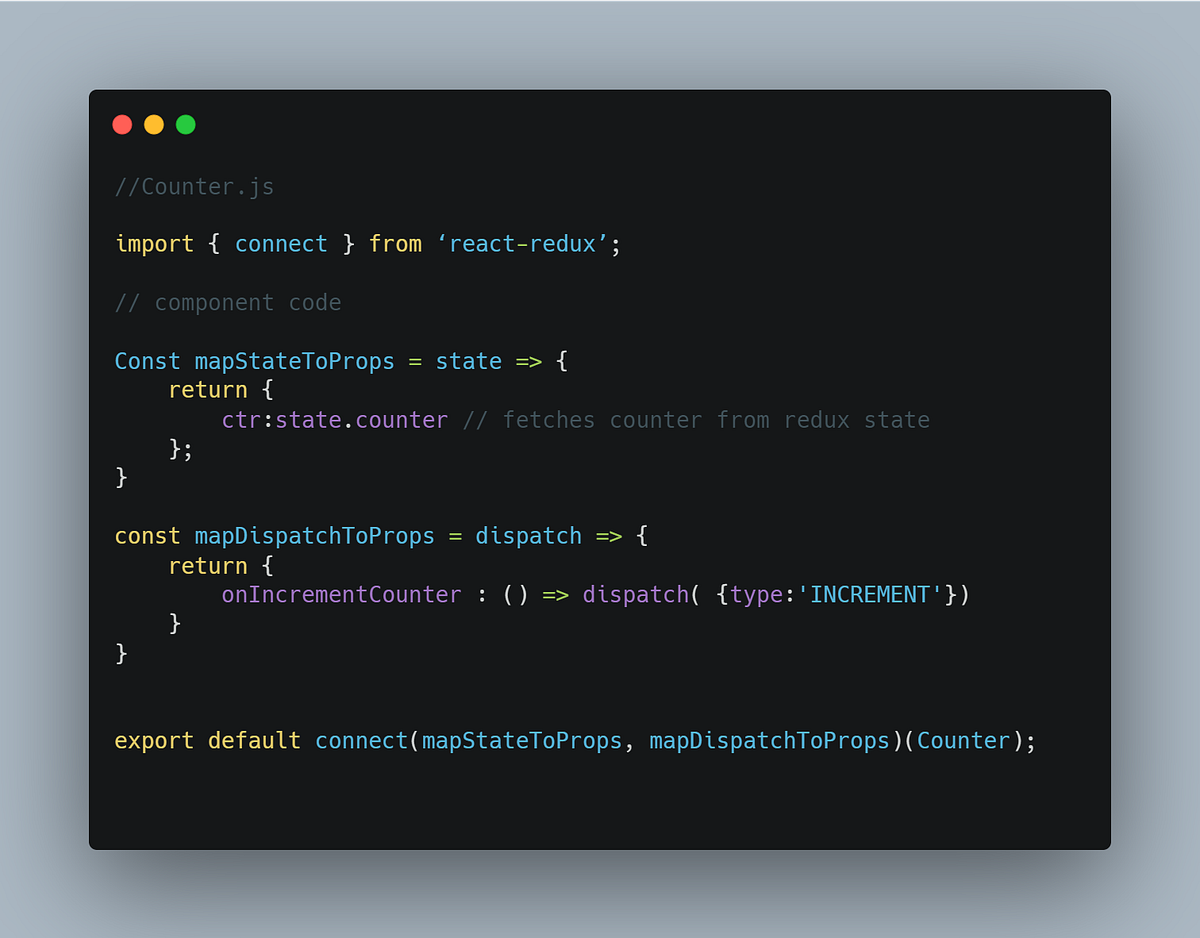
We provide our Increment button with OnClick which should refer to our method onIncrementCounter which will be passed via our props to the Component
<button onClick={this.props.onIncrementCounter}>Increment</button>
Now, we add this Action to our reducer so that we know what to do when this action is dispatched
Now, let’s consider the situation where we may need to Pass and Retrieve Data(payload) With our Action
In our Counter component lets add a new Action onAddCounter for adding 10 to the counter.
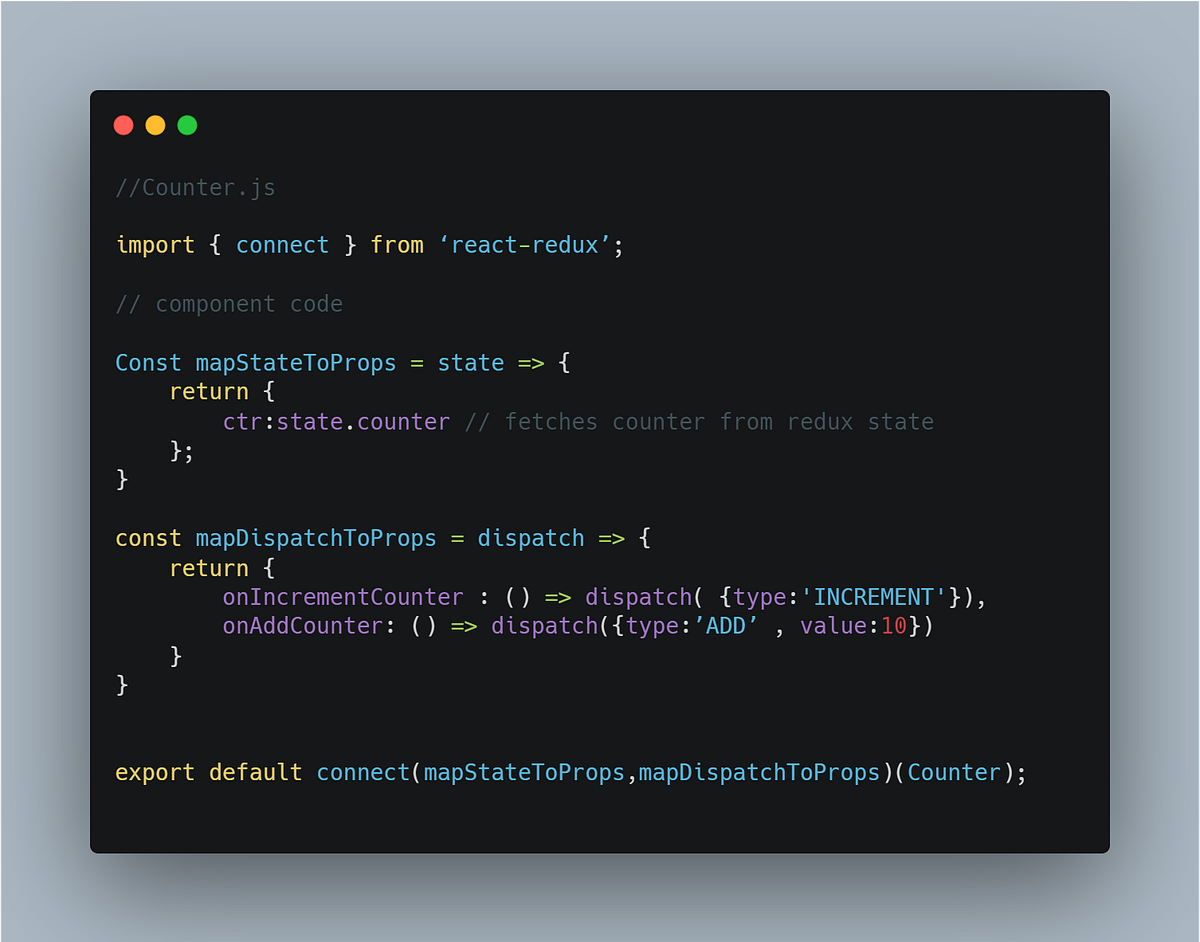
We provide our ADD 10 button with Onclick which should refer to our method onAddCounter which will be passed via our props to the Component.
<button onClick={this.props.onAddCounter}>ADD 10</button>
Now, we add this Action to our reducer with type “ADD” and the value provided with the action.
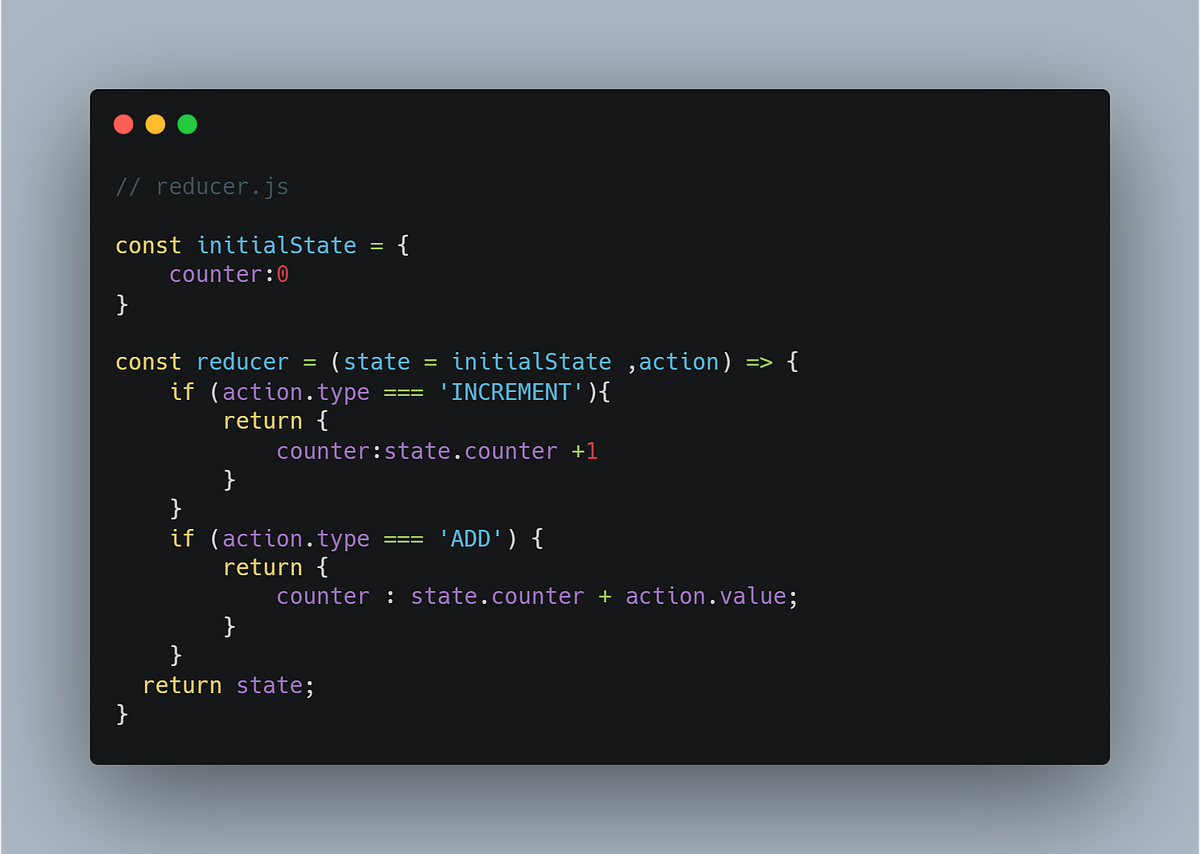
Personally I prefer using switch case in my reducers. This can be done in the following way.
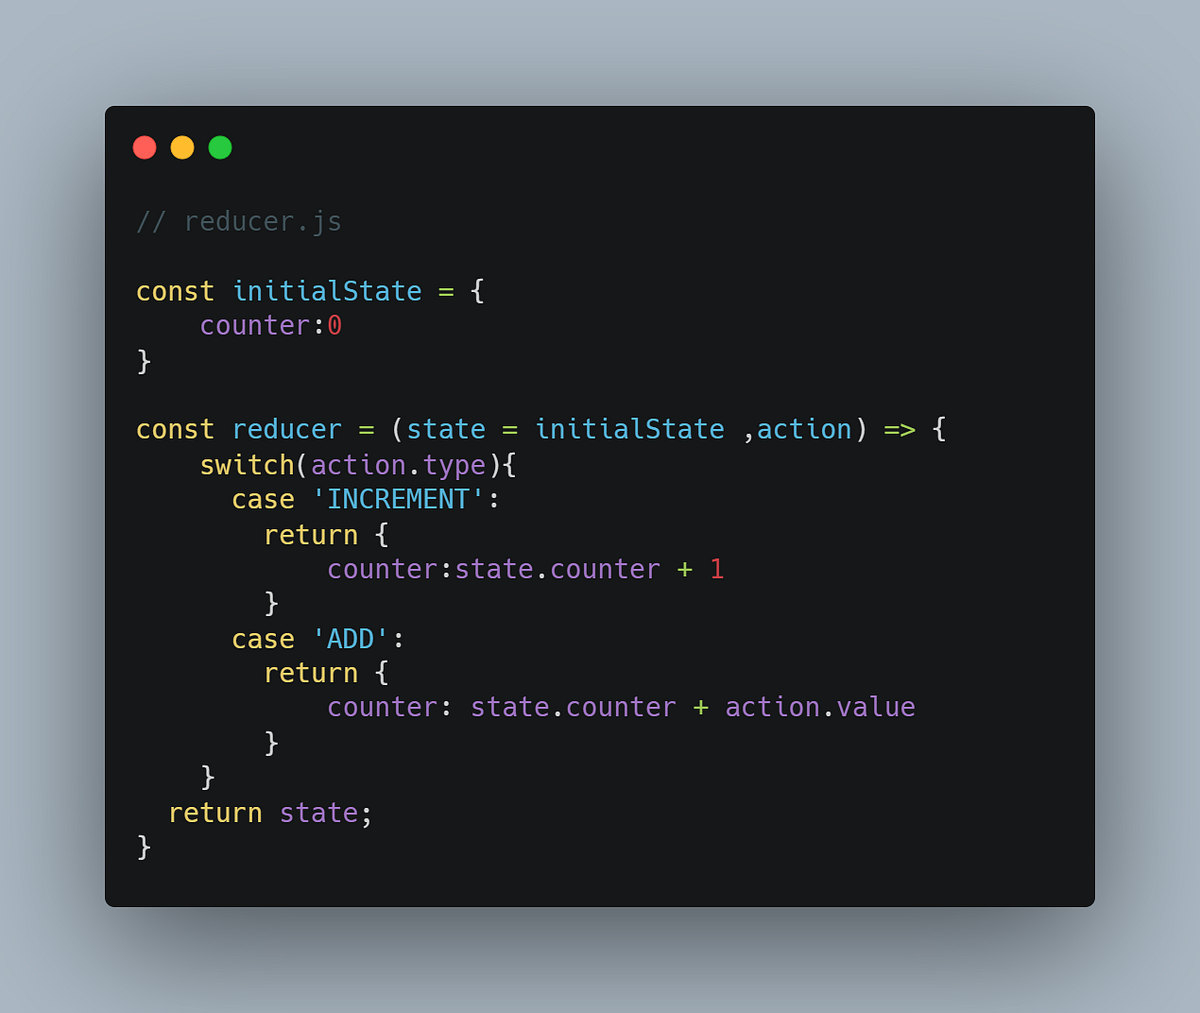
The above steps will provide us with a basic react app that has a centralized store that has a current count that can be passed throughout the app on a subscription model and that can be updated from anywhere we want in the app.
We can see clearly how using Redux can be beneficial to us when used with React.
The use of Pure reducer functions can make our logic easier to test and understand and centralizing the state can make it easier to implement things like an application wide UI theme or persisting data without having long props chain.
If you have anything of your thoughts that you would like to add, please do in the comments below :)